Draw on the lines as illustrated in the diagram
with a pencil. Draw these lines very lightly, and
they will not show up in the final design.

|
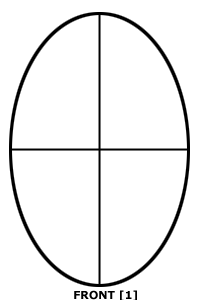
Front (1) shows the egg divided into eighths. You start by drawing one long line around the longest part of the egg, until it meets up with itself. Next, draw a long line at a right angle to this one, until it meets up with itself. Lastly, draw one line around the middle of the egg. Now the egg is divided into 8 equal sized parts.
See Top (1) for what the top of the egg should look like now.
|
|
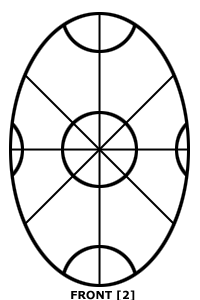
Front (2): Wherever there are two lines intersecting, draw a circle. There should be 6 circles in total.
(Don't forget to draw the circles on the front and the back of the egg).
|
|
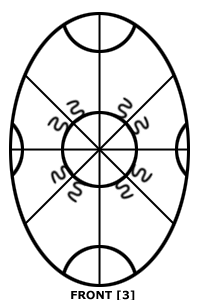
Front (3): Now, draw some squiggly lines from the circle. Try to keep the squiggles the same length.
|
|
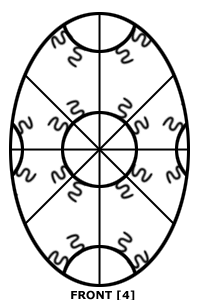
Front (4): Complete the squiggles around each circle, front and back.
|


